Create a system restore point
The system restore function that comes with Windows can record the changes made to the system by setting the restore point. In the event of a system failure, using System Restore can restore the system to the state it was in before the changes were made and continue to be used normally.
Note: For more operation methods, you can also visit Microsoft's official website to create a system restore point.
Operation Steps:
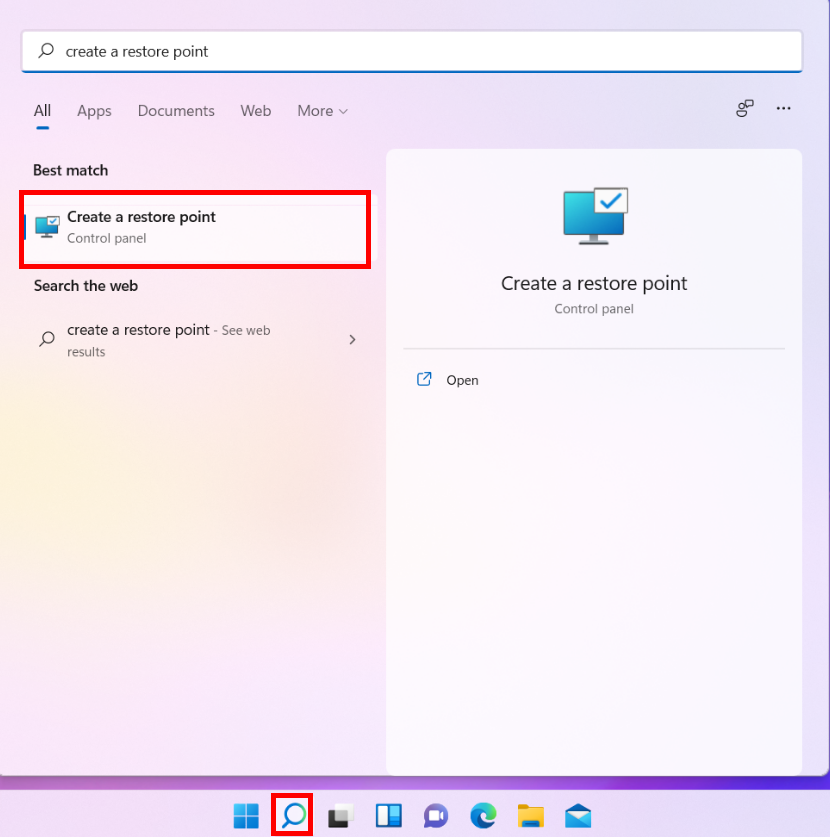
1. In the search box on the taskbar, enter "create restore point" and open it.
2. Go to System Protection and create a restore point for the C drive. If Off is displayed in the Protection field for the C drive, click Configure, select Turn on system protection, and click OK.
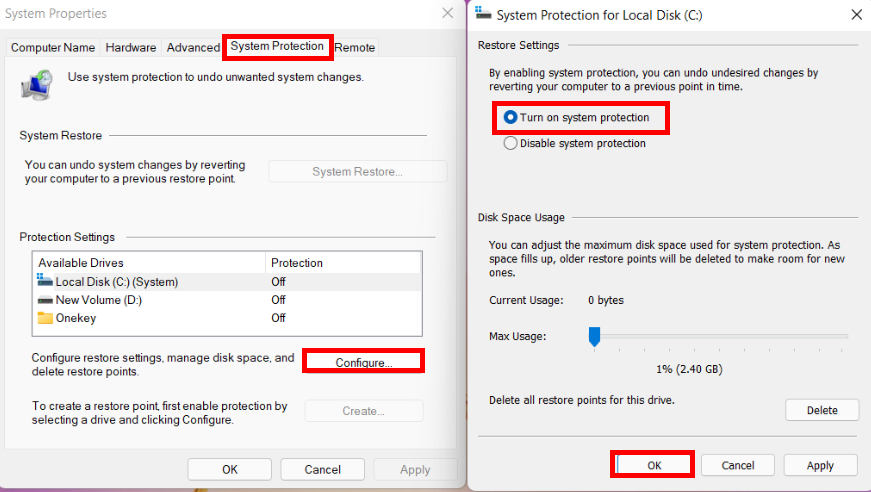
3. After protection is enabled for the C drive, click Create and enter the name of a restore point in the displayed System Protection window. Click Create.
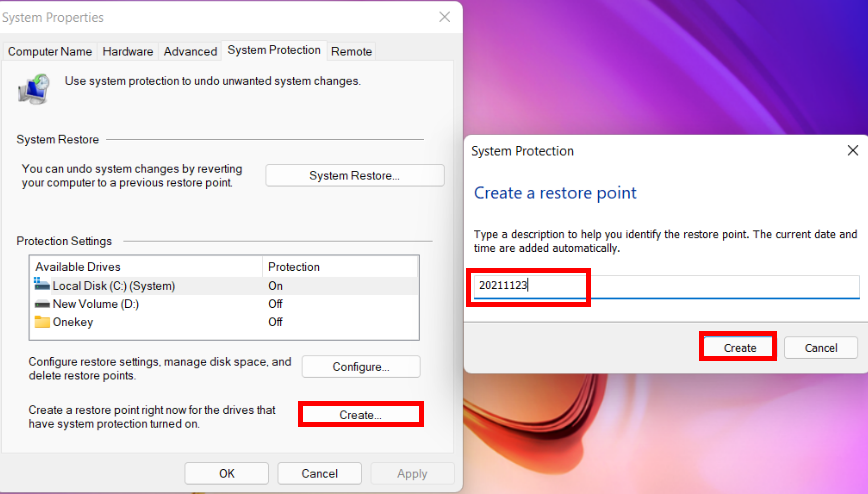
4. Click Close in the dialog box displaying The restore point was created successfully

Using System Restore:
System Restore can be used when a new app, driver, or Windows update is installed, or when you manually create a restore point. It will delete the apps, drivers, and updates that were installed after the restore point was created, but it will not affect your personal files.
To roll back to the restore point, perform the following:
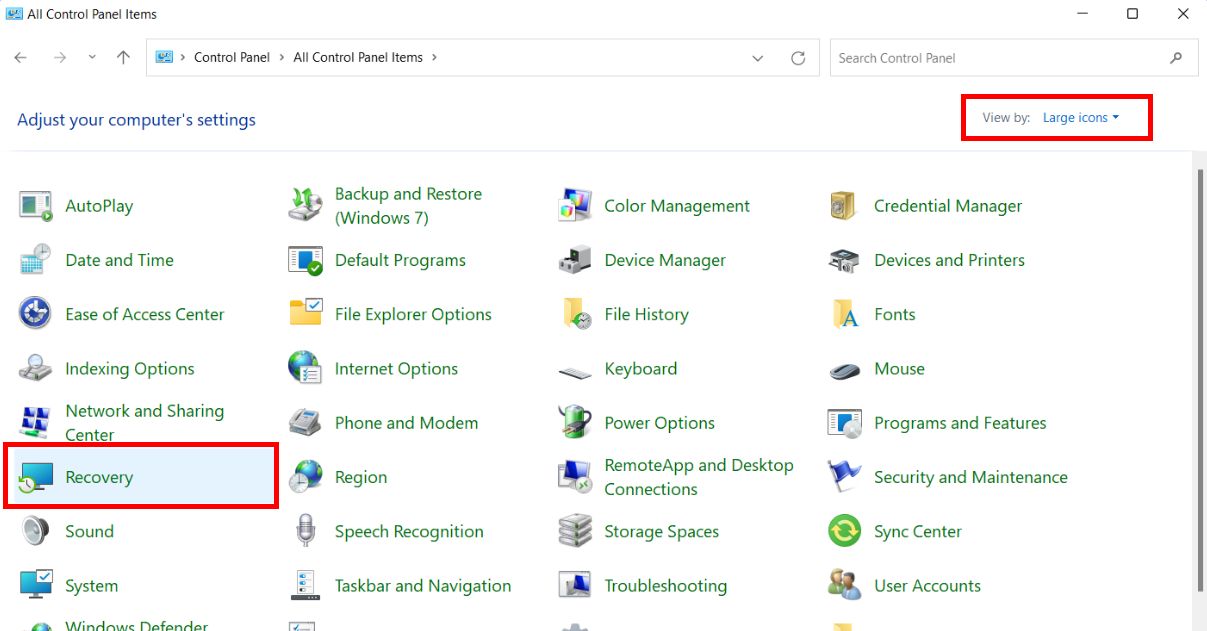
1. EEnter Control Panel in the search box on the taskbar and open it.

2. Change the View by option to Large icons and click Recovery.
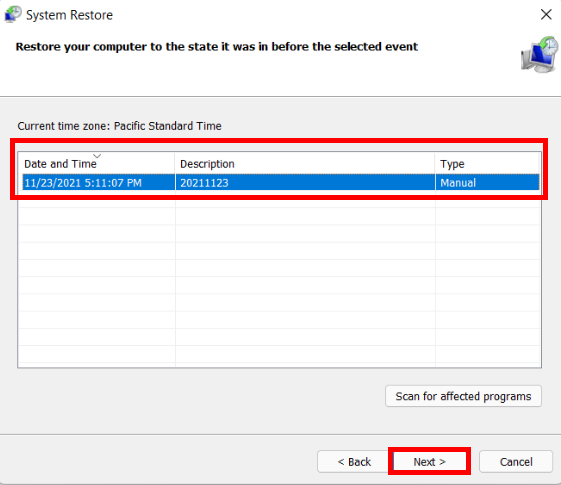
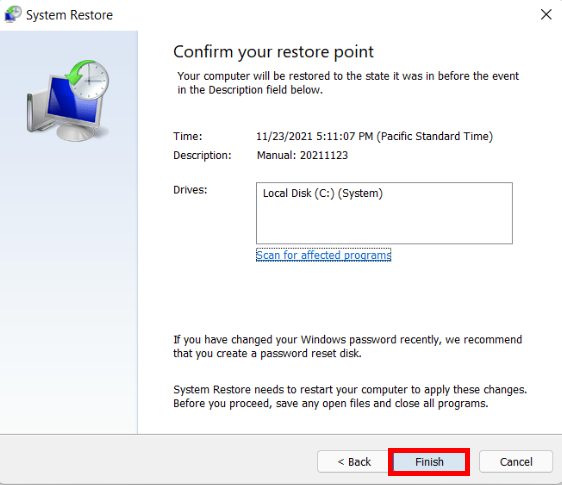
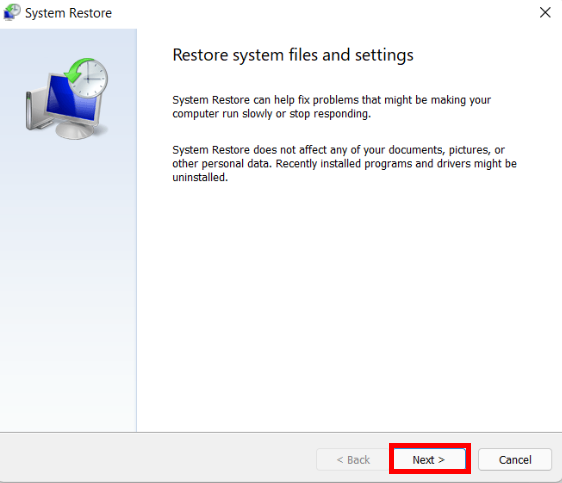
3. Go to Open System Restore > Next

4. Select the restore point related to the faulty app, driver, or update, and then click Next > Finish.